

Step by Step Guide: Salt Water Fly Tying for Beginners 3D Baitfish
Featuring: Ole Florida Fly Shop
In this tutorial, we'll guide you through the process of tying an 3D baitfish, a versatile pattern renowned for its effectiveness on saltwater predators
You'll learn step-by-step instructions for tying this fly, along with some helpful techniques to achieve some sick results. From preparing materials to finishing touches, ensuring that even novice fly tiers can follow along.
Materials Needed:
Hook
EP fiber (base color, bottom color, top color)
Flash material
Thread
Super glue gel
Eyes
Step 1: Prep Materials
Before starting the tie, prepare your materials for easy access. Use a small piece of wood with Velcro to hold your EP fiber in place.

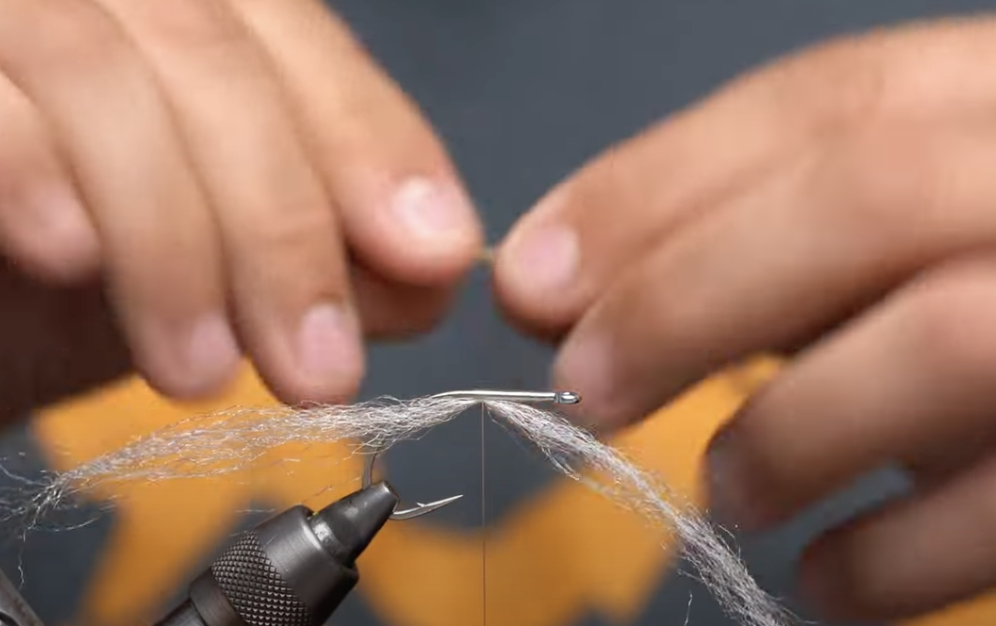
Step 2: Prepare Tail
Take a pinch of EP fiber in the base color, around 30 strands, and press it onto the Velcro. Add a slightly thinner clump of EP fiber in the bottom color below it, then top it with another clump of EP fiber in the top color.

Step 3: Attach Tail
Secure the hook in the vise and start your thread a little behind the hook eye. Wrap the thread to a point just in front of the hook point and trim off the excess.
Step 4: Attach Bottom
Cut the bottom EP fiber material in half and even out the tips. Tie it in the middle of the first clump with loose wraps, then adjust the position and tension before securing it completely.

Step 5: Repeat for Top Material
Repeat the process for the top EP fiber material, ensuring even distribution and tension. Wrap forward and backward to cover the shank, manipulating the materials as needed.

Step 6: Fold Materials
Fold the EP fiber materials around the hook shank to cover both sides evenly. Manipulate them to achieve the desired coverage and shape, then secure with thread wraps.
Step 7: Secure Bottom
Repeat the process for the second set of bottom EP fiber material, ensuring it matches the first in thickness and distribution. Fold it over and secure it with thread wraps.

Step 8: Add Flash
Select a small amount of flash material and spread it evenly over the EP fibers. Secure it with thread wraps, adjusting the amount as desired for a subtle shimmer.
Step 9: Add Eyes
Apply a small amount of super glue gel to the fly's head and attach the eyes, covering the tie-in points for a clean finish.

Step 10: Final Trim
Trim any excess EP fiber material, ensuring the fly maintains a sleek profile. Focus on trimming close to the hook point and under the eye for a tidy appearance.

Step 11: Finished
Once trimmed, the EP bait fish fly is ready for action. Consider adding a weed guard for fishing in snag-prone areas. Enjoy tying and tight lines!
This EP bait fish pattern is versatile and effective, suitable for various fishing conditions. Experiment with different color combinations and sizes of EP fiber to match your target species. Happy tying and tight lines
Watch Below 👇👇👇👇
From: Ole Florida Fly Shop
Learn how to tie a baitfish pattern with EP Fibers - and soon you'll be able to match any baitfish anywhere in the world. To get the full material list and kits, head to: http://bit.ly/3Luobov